Git
Summary
Git is the preferred version control system for Dendron. This page goes over best practices for using Dendron with Git.
Prerequisites
- Install
git
Getting Started
NOTE: These instructions go over using Dendron with github
- VS Code ships with an extension that manages Git source control support.
Note: VS Code uses your computer's Git installation, so you need to install Git first before you get these features. Make sure you install at least version 2.0.0.
- Open your local Dendron workspace.
Note: If you are new to Git, the git-scm website is a good place to start, with a popular online book, Getting Started videos and cheat sheets. This documentation assumes you are already familiar with Git.
- Click on
Initialize Repositoryto set up a git repo in the Dendron vault.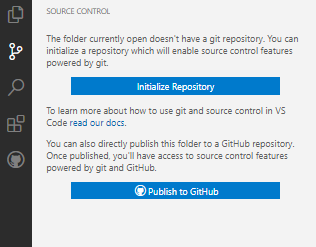
- Then, once you've added and committed the files, use the command palette to
Publish to GitHub.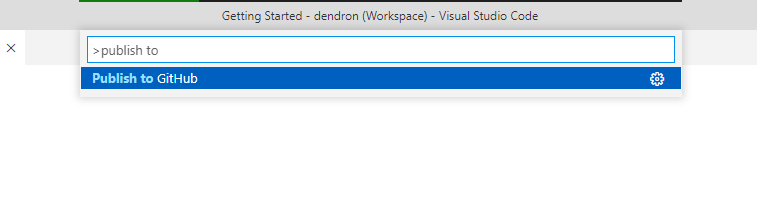
- Follow the prompts and once you've entered in your GitHub credentials, you should be done.
If you don't want to publish your notes just yet, make sure to mark the Git repository private.
Lookup
This section borrows heavily from the following:
- https://stackoverflow.com/questions/46877667/how-to-add-a-new-project-to-github-using-vs-code/63898638#63898638
- https://code.visualstudio.com/docs/editor/versioncontrol
Backlinks